Photographing spiders
![]()
|
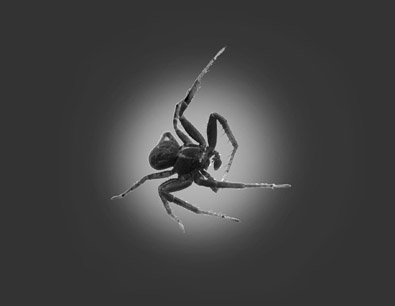
Shooting spiders are often a test of patience, at least when it comes to individual species.At times it can take a very long time to get certain spiders to stand still long enough to get a usable picture of them.Photo Technical adviceBy Magne Farlund
To give advice on camera settings is a difficult exercise. Both because the quality of equipment varies widely, and because light switch. There will be various opinions about most things. But I can mention some general facts in a situation where you shoot small creep with a macro lens. It
is about the choice of aperture or shutter priority, setting the
ISO value, and focus setting. And often it is about the use of
a tripod. Should you take pictures of species, try to achieve
good depth of field, and add the best possible conditions for
electronic imaging after.
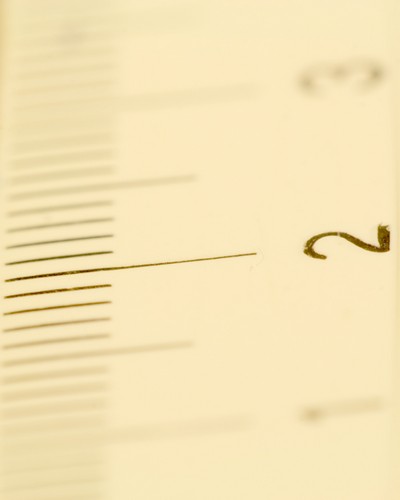
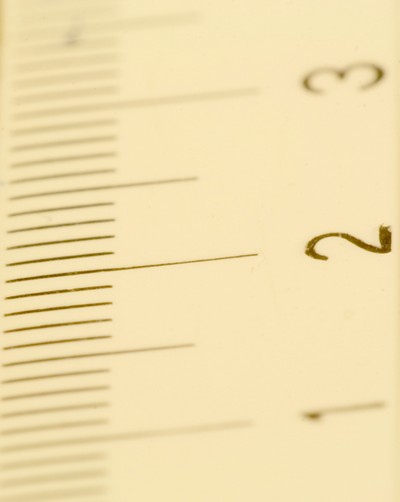
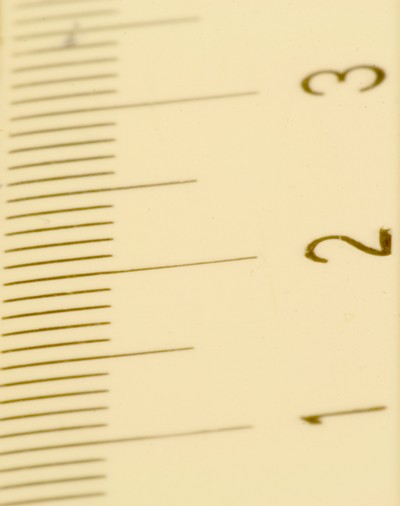
Aperture. The choice of aperture is about on how quickly you want to let light into the imaging chip. Lower aperture numbers mean large aperture, high numbers small aperture. That is, the higher the aperture value you use, the longer the shutter speed will be for the same amount of light to escape into. Longer shutter speeds, gives greater depth of field. Increased distance to the object also provides increased depth of field, but with small spiders you have to come as close as possible.
Example Images. Here
it is used macro lens with three intermediate rings. These rings
are necessary when you take pictures of small spiders. Without
the intermediate rings the cropping of the images afterwards will
be too extensive, with grain images as a result. The pictures
are taken with artificial light. In good daylight the closing
time will be slightly shorter, but with approximately the same
depth of field.
Picture
1:
Picture
2:
Picture
3:
Picture
4: Aperture Priority f/22 -shutter speed of 10.0 seconds
and the depth of field of approx. 15mm.
With the exception of shooting in good light, high aperture numbers often requires a tripod, even if your camera has a bright lens and image stabilization (IS). Sunlight on the subject gives a short shutter speed and allows hand-held camera, and it can give good results. But often a stable and good tripod is a must. The tripod should be of a type where the legs can be adjusted as far down as possible in order to get close enough to the smallest creeps on the ground. Some choose to shoot without a tripod, and preferably with the use of flash. However, to avoid reflections in the insects oil blank chitin shell, one should also try to filter the flash or the help light.
ISO ISO is in relation to shooting a measure of sensitivity to light. Low ISO value gives a low sensitivity to light, visa versa. This means that dim lighting can increase the ISO value, for example, from ISO 100 to ISO-400, to shorten the shutter speed. This can be an absolute necessity if the subject is in motion. But setting a high ISO number has some downsides. There are in general good reasons to choose a low ISO number. I will illustrate the difference by comparing the way painters paint on a tightly woven or a rough canvas. A tightly woven canvas (read: low ISO numbers) will reveal many more details and small color shades than a rough canvas (high ISO number). When you take landscape pictures it won`t be much of a difference. To get the details on a small spider, it makes a big difference. Taking picture of a spider with a body length of 2 millimeters, the difference will be obvious when you look at it on a big computer monitor. Modern cameras can handle ISO settings of 200 and 400, even when the object contains small details. The problem reveals itself when a tiny spider only fills a small area of the image surface and extensive cropping is needed during the electonic crop after treatment. It's like moving closer and closer to a painting. The painting becomes larger and larger in the field of vision, and the subject becomes more and more blurred. If you want to compensate by sharpening the image in an imaging program, you will quickly discover that only small adjustmensts can be made. Sharpening has already been done by using high ISO value. Further sharpening will make the image very grainy, with the loss of detail as a result. The recommendation is therefore to use the lowest ISO value.
Focus adjustment. Even with the choice of a low ISO value and a high aperture number, you may not get a good exposure (right amount of light). If you set the camera on low ISO and select aperture priority (Av) with a high aperture number, the automated metering will determine the shutter speed. That is why it is important that the metering is at the object itself, and setting the central focus is required.This is particularly important if you shoot against a background that is substantially lighter or darker than the object you are shooting. If the the central focus point is not on the object, the result will be over-or underexposure.
Autofocus and manual focus. If you use auto focus during macro photography, you can have problems with depth of field - even if you use a tripod and select a low ISO value and high aperture numbers. With the focus point on the back of a spider, obliquely from above, the distance to the outermost point on the outer leg, will be too long to get the full depth of field. At the same time the focus point often has to be on the back of the spider for proper metering. Again, the choice of a tripod and manual focus is a better solution. You should select the focus from a middle distance. Even with good equipment, it will be difficult to achieve depth of field of more than 10 to 15 millimeters of macro photography because of the short distance between the lens and object.
White balance.. The correct white balance is very important for color rendering. Often, auto white balance works well, but if you choose to set the white balance manually, it is important to remember to check it each time. Options are often symbols for sunny, cloudy, incandescent, fluorescent and flash. The result can be influenced significantly by incorrect white balance setting. A good rule of thumb I use in the settings of my camera (sometimes even I forget the rule myself) is HIV. H = WB. I = Iso. V = Value (for either aperture or shutter priority).
What kind of technique?
We can choose whether we want to take pictures of spiders in their natural habitat, or make an artificial background. The disadvantage of the spiders web, is that the least breath of wind causes the entire subject to "flap", and the object becomes unclear. If you choose to take the pictures outside, my advice would be to do it in calm weather.
Many spiders have very good camouflage colors and patterns, but
if you can discover them, you will see them with the naked eye.
On pictures however, it is entirely different. Often it may disappear
totally against an uneasy background, the contours of the legs
and body will be erased. Think about how the background is before
shooting.
Some color theory Colors are relative things. How often have we not bought paint or clothes in a store, then come home and discover that it was not the "right" color? I think most of us have experienced that..;) So why does this happen? The reasons are many. The lightening of the store, colors on walls, or "neighboring colors"on a color map, and more. Many things come into play. In
color theory used terms like "complementary", quality
contrast and simultaneous contrast
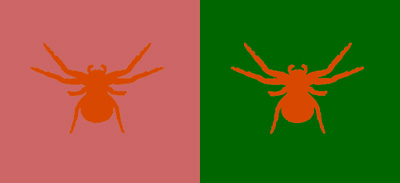
Complementary contrast: -The strongest contrast you can find. This includes colors that stands 100% against each other in color value. In the illustration below, it is easier to see what this means. Example
1. A red spider will have the strongest red color
on a green background. Thus, each color has its complementary color on the opposite side of the circle, which will reinforce it.
The illustration shows the colored spiders on their respective complimentary color.
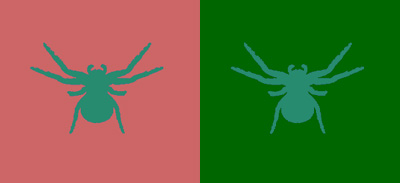
Many peope will wonder and ask, -Do not all colors have "the same color", regardless what background they are put up against? Our brain gets deceived in terms of perception of color. When it receives a light signal from an object, this will be transformed into an information we can understand. The brain does not only receive the light from the main object, it also takes the light from other elements around, and mixes into a stir. This is what we call illusion and delusion. In other words: the brain is fooling us! (Light is a mixture of all colors) These "visual deceptions"can be used constructively in eg art, advertising, or as in our case, spider-shooting. Take for example a red tomato. When placed on a green surface (which is always done in the fruit shelves), the red color seem brighter and stronger. It is more "delicate" in other words. This is the stores way of making everything in the fruit section look delicious and fresh, a sale trick, good one too! ;)
These
two spiders have the exact same color. The spider placed on the
green background, looks more red because it is placed on a complimentary
color to red. Our brain is "tricked". This can be used in photographing too. By being aware of what colors that can be set up against each other to get the sharpest contrast, we can achieve an effect that enhances the illusion we want. We can roughly divide the color wheel in two parts. Left and right half. The left shows the "cold"colors, while the right side shows the "warm " colors.
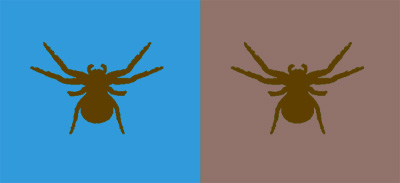
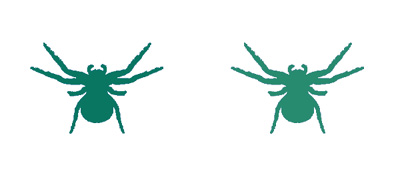
Simultaneous contrast It is rare to see as pure colors in nature as we see from the example of the color circle. They are a mixture of yellow, red and blue. The color brown consists from a mixture of blue, red and yellow. The more blue in the mixture, the "colder" the brown color will seem. A brown spider will get different shades of brown, all depending on what background you put it on. Here are a few examples: Example. 1
The
spider to the left seems "warmer" (more red) in color,
because the blue around is forcing our brain to "add on"
a little extra red. (Both spiders have the exact same color)
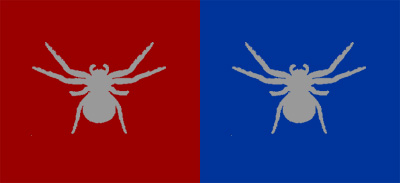
Example. 2
Two
spiders with the exact same color. The left seems darker because
of a mirage. Our brain perceives it as darker on white background.
The opposite happens on a black background
Example. 3
Even with the same hue on the spiders, the one to the left seems "cold" because of the simultaneous contrast. It's quite strange how we perceive color, it all depends on the background which the spider is set upon.
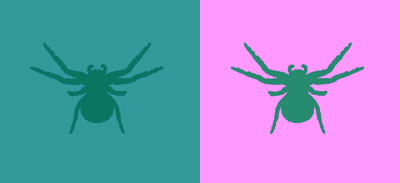
Example. 4
Same effect as the picture above, only this time I have used turquoised spiders.
Example. 5
These spiders look like they have the same color, but do they really?
Example. 6
Nope, I have tricked you! In example 5, the spider to the left is a little darker, although it does not look like it is. In example 6, one can easily see that the one to the left is darker against a white background. It is much harder to see the color difference in example 5 because the brain gets confused by the colors around the object.
Summary of color theory: If the spider is brown or reddish, the color will come out better against a "cold" background like blue or green tones. If it is white or yellow, a background color with a violet tint will reinforce the object color. The key is to find a background that highlights the spider so that it becomes easier to see. If you have the color circle in mind while shooting, the result will probably be pretty good with a little practice. On
a white background nearly all colors becomes neutral, and can
be used. Just be a little aware of that black shiny spiders can
get the light reflecting enhanced by the white background. The
shooting angle and the camera setting often determines this.
Where do I find motives?It is tempting to say, Everywhere! One can look in basements, buildings, houses, gardens, forests and mountains. Many spiders do not build webs, they hunt for their prey. You can seek them out for yourself or sit and wait until they come to you. Remember that there are not many spiders that can be identified by just taking a picture of their habitus. You may want to get some pictures of the spiders underside, where their genitals sits (female), or the palps (male), that sits in front of the spider. This is not easy but you can use a glass to put the spider in and then take pictures from underneath. The clearer pictures you get, the easier it makes the identification. After the "photoshoot" you can place the spider back in its web again.
Setting If you want a white background, a deep dish is very useful. Place the spider in the dish and shoot ..,-when the spider is standing still that is. Not all of them do. The species within Theridiidae can run around down there in the bowl for hours if they feel like it. Thats when you need patience....a lot of it! Some Linyphiids can also do this. Wolf spiders are rather easy to handle when shooting pictures. They run around for a few, then stops, and sits still. Other species are some tricksters,-especially Clubiona. They may apparently seem slow and sluggish, but do not be fooled. Suddenly they explode into activity, and they are gone. They run straight up the wall of the dish..and in a few seconds they are gone! The Philodromidae species also do this! Here is a small list of genera that climbs straight up smooth surfaces, and require extra vigilance during shooting: Clubionidae, Miturgidae, Philodromidae, Anyphaenidae, Salticidae, Thomisidae, Gnaphosidae, Corinnidae and Sparassidae. The remaining known species are usually unable to climb the dish wall. Most spiders, however, operate with something called "ballooning". That means that they lift their back end and lets out a thin silk line. This can be several meters long, and is ultimately taken by the wind. Then they suddenly sweeps out of the dish, and disappear right in front of the poor photographers nose! This applies to any small and juvenile spider.
The author out in the field photographing spiders.
Good Luck!
|


